As the summer days wind down and the school year begins, there’s no better way to celebrate than with a batch of delicious, decorated sugar cookies. These cookies are not only fun to make, but they also bring a sense of joy to both kids and teachers alike. Whether you’re baking with your children or preparing a sweet surprise for the classroom, decorated sugar cookies make the perfect treat for a new school year. In this guide, we’ll walk you through how to make and decorate the best back-to-school sugar cookies.
Table of Contents
Crafting the Perfect Sugar Cookie Dough
Choosing the Right Recipe
The first step in creating beautiful decorated sugar cookies is choosing the right dough. A good sugar cookie dough should be sturdy enough to hold intricate designs, but tender enough to melt in your mouth. Look for a recipe that incorporates butter for flavor and a bit of flour for stability. A classic sugar cookie dough with added almond extract for depth of flavor can make a significant difference. You can find a reliable recipe for this here: 15 Healthy School Lunch Ideas for Kids.
Preparing for Decoration
Once your dough is mixed and chilled, roll it out to about 1/4-inch thickness. The dough should be firm enough that it doesn’t spread too much while baking. Use cookie cutters shaped like apples, pencils, school buses, and other back-to-school icons. Arrange your cut-out cookies on a baking sheet lined with parchment paper to prevent sticking. Once baked, allow the cookies to cool completely on a wire rack before starting the decoration process.
Print
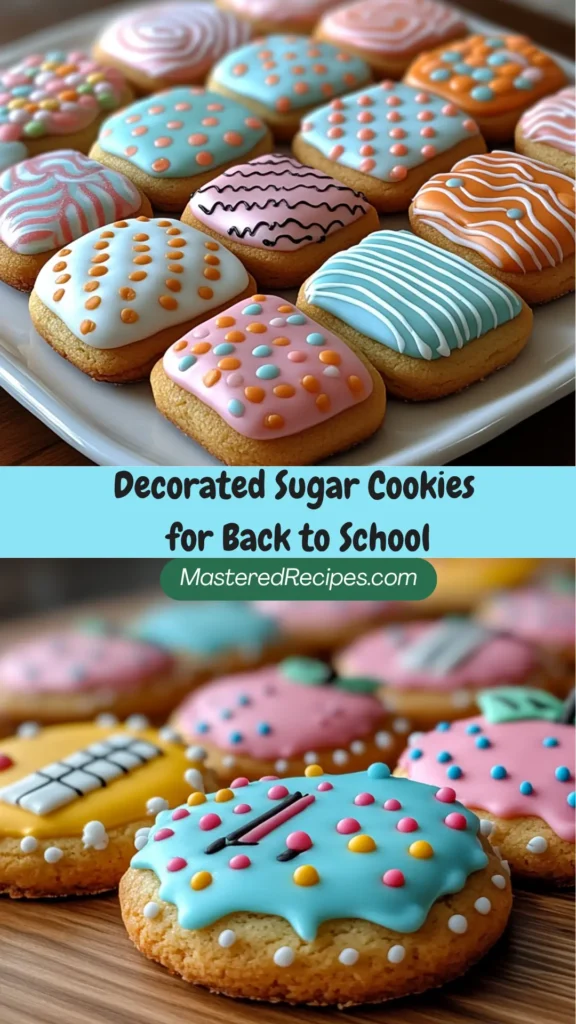
Back to School Sugar Cookies Decorated
- Total Time: 25 minutes
- Yield: 24 cookies
Description
These back-to-school sugar cookies are decorated with royal icing in fun, school-themed shapes like apples, pencils, and notebooks. Perfect for classroom treats or teacher gifts.
Ingredients
- 2 3/4 cups all-purpose flour
- 1 teaspoon baking soda
- 1 teaspoon baking powder
- 1 cup unsalted butter, room temperature
- 1 1/2 cups white sugar
- 1 egg
- 1 teaspoon vanilla extract
- 1/2 teaspoon almond extract
- 1/2 teaspoon salt
- Royal icing (powdered sugar, meringue powder, water)
- Gel food coloring
Instructions
- Preheat oven to 375°F (190°C). Line baking sheets with parchment paper.
- In a medium bowl, mix flour, baking soda, and baking powder.
- In a large bowl, cream together butter and sugar until light and fluffy.
- Beat in egg, vanilla extract, and almond extract.
- Gradually blend in the dry ingredients.
- Roll out dough on a lightly floured surface to 1/4 inch thickness.
- Cut into desired shapes using cookie cutters.
- Place cookies 1 inch apart on prepared baking sheets.
- Bake for 8 to 10 minutes, or until golden at the edges.
- Let cool on baking sheets for a few minutes before transferring to wire racks to cool completely.
- Once cooled, decorate with royal icing tinted with gel food coloring.
Notes
Ensure cookies are completely cooled before decorating to prevent smudging. Store decorated cookies in an airtight container at room temperature for up to 5 days.
- Prep Time: 15 minutes
- Cook Time: 10 minutes
- Category: Dessert
- Method: Baked
- Cuisine: American
Nutrition
- Serving Size: 1 cookie
- Calories: 150
- Sugar: 20g
- Sodium: 50mg
- Fat: 7g
- Saturated Fat: 4g
- Unsaturated Fat: 2g
- Trans Fat: 0g
- Carbohydrates: 20g
- Fiber: 1g
- Protein: 1g
- Cholesterol: 30mg
Keywords: sugar cookies, decorated, back-to-school, royal icing
Decorating with Royal Icing
Mixing the Royal Icing
Royal icing is a must for decorating sugar cookies, as it dries hard and holds its shape well. To make royal icing, you’ll need powdered sugar, meringue powder, and water. If you’re aiming for a smooth finish, make sure the consistency is runny enough to flow easily but thick enough to hold up against gravity. You can adjust this with more powdered sugar for thickness or a few drops of water to thin it. For more cookie decorating tips, check out How to Make Peach Lemonade.
Applying the Icing
Once the icing is ready, divide it into small bowls and add gel food coloring to each bowl to create the colors you want for your cookies. Begin by piping an outline around the edge of the cookie with a fine-tipped piping bag. Then, flood the center with a thinned version of the icing. Use a toothpick to spread it evenly and smooth out any air bubbles. Let the icing dry for several hours before adding any additional details, ensuring your designs stay neat.
Creative Back-to-School Designs
Apple and Pencil Themes
Nothing says “back to school” like apple-shaped and pencil-shaped cookies. For apple cookies, pipe red icing for the body, green for the leaf, and brown for the stem. For pencil cookies, use yellow icing for the body, pink for the eraser, and gray or black for the tip. These designs are simple yet striking and can be completed with just a few different colors of icing. Get more inspiration for creative baking here: How to Make Classic German Cucumber Salad.
Notebook and Crayon Designs
Notebook-shaped cookies are perfect for a back-to-school theme. To create these, cover the cookie with a base layer of white icing, then pipe horizontal lines in blue, red, or black to represent notebook paper. Crayon cookies can be just as fun—choose bright colors like red, blue, or yellow, and use the icing to create the crayon’s label and tip. The creative possibilities are endless, and the result will surely impress anyone who receives one of these delicious treats.
Packaging and Gifting Ideas
Presenting Your Cookies
Once the decorated sugar cookies have dried completely, it’s time to think about packaging them. Clear cellophane bags tied with colorful ribbons are an easy way to present your cookies. You can also add a personalized tag to each bag, making it a thoughtful gift for teachers, classmates, or friends. Whether you’re gifting them in a basket or handing them out individually, the presentation will make your cookies extra special. Learn more about creative gifting ideas here: How to Make Polylang Compatible with Rank Math.
Creative Gifting
For a personal touch, consider pairing your cookies with a small school supply item like a fun pencil case or a cute notebook. This small but thoughtful gift can go a long way in making a lasting impression. The school year may be just beginning, but you can already start creating memories with these fun and tasty gifts.
Frequently Asked Questions
Can I Use Buttercream Instead of Royal Icing?
Yes, buttercream can be used for decorating, but it remains soft and may not hold intricate designs as well as royal icing. It’s better suited for simpler decorations or cookies that will be eaten quickly.
How Do I Prevent My Cookies from Spreading?
Chill your dough for at least an hour before baking. This will help maintain the shape of your cookies. Additionally, avoid using too much butter or eggs in your dough, as this can lead to spreading.
How Long Should I Let the Icing Dry Before Packaging?
Allow the icing to dry completely, which can take several hours or even overnight, depending on the thickness of the icing. The cookies should feel firm to the touch before packaging.
Conclusion
Back-to-school sugar cookies decorated with royal icing are a perfect way to celebrate the start of the new school year. Not only do they bring joy to the classroom, but they also offer an opportunity to get creative in the kitchen. With the right recipe, decoration tips, and a little patience, you can create beautiful cookies that will be remembered long after the school bell rings.