What is a Dinosaur Cake?
A dinosaur cake is a creatively designed dessert inspired by the prehistoric creatures that roamed the Earth millions of years ago. These cakes can range from simple designs with dinosaur-themed decorations to complex sculpted cakes that resemble actual dinosaurs.
When making a this cake, the design possibilities are endless. From 2D dinosaur images on the cake to 3D sculptures, these cakes can reflect a wide variety of dinosaur species, such as Triceratops, Stegosaurus, or Velociraptor. Whether you choose a cute cartoonish design or a more realistic approach, a dinosaur cake is a fun and tasty way to capture the fascination with these ancient creatures.
Table of contents
Popular Dinosaur Cake Styles

When you decide to create a dinosaur cake, the first step is to choose your style. Depending on your skill level and the party theme, there are many options to consider.
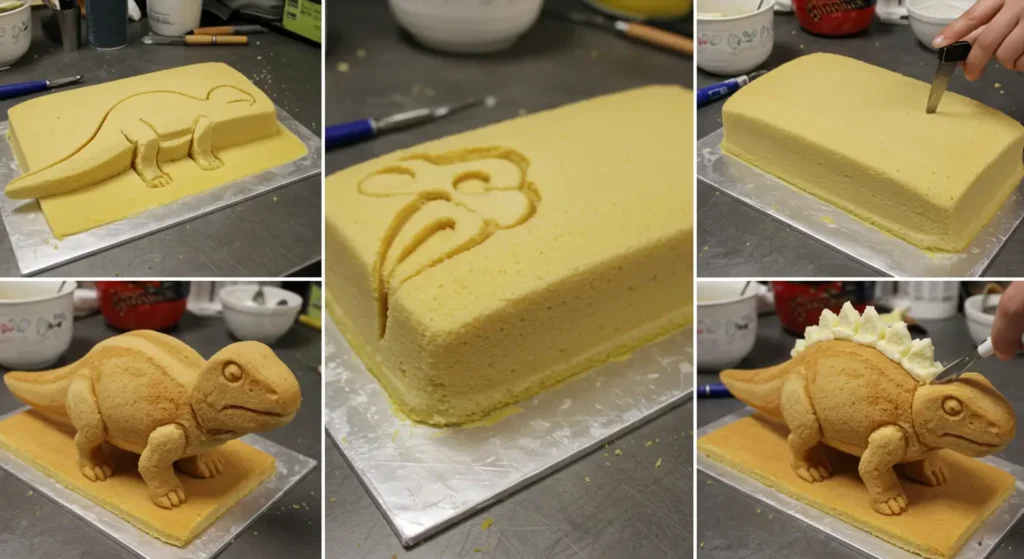
- 3D Dinosaur Shape: These cakes are sculpted to resemble a full dinosaur. Popular options include T. rex, Triceratops, or Brachiosaurus. The cake’s body is carved into shape and covered in fondant, while additional details like eyes, spikes, and tails are added with buttercream or fondant.
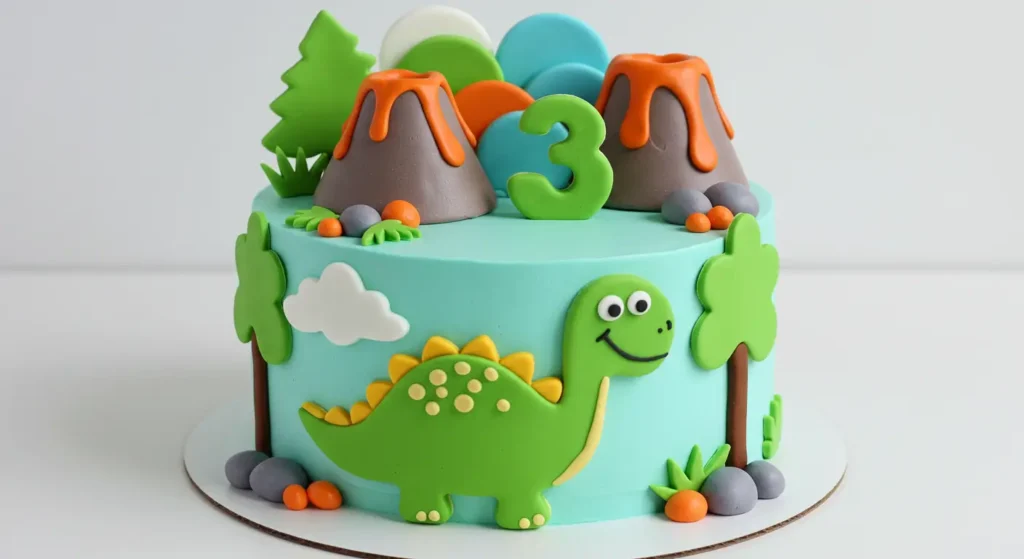
- Dinosaur Scene Cake: A more elaborate design involves creating a full scene. Think of a cake with a dinosaur surrounded by trees, volcanoes, and other elements from the Jurassic era. The cake can be a landscape featuring multiple dinosaurs, perfect for bigger celebrations or for fans of prehistoric times.
- Classic Dinosaur Figures: For a simpler approach, place edible dinosaur figurines on top of a regular round or square cake. Decorate with grass-like textures, little rocks, and trees to make it feel more like a miniature prehistoric world.
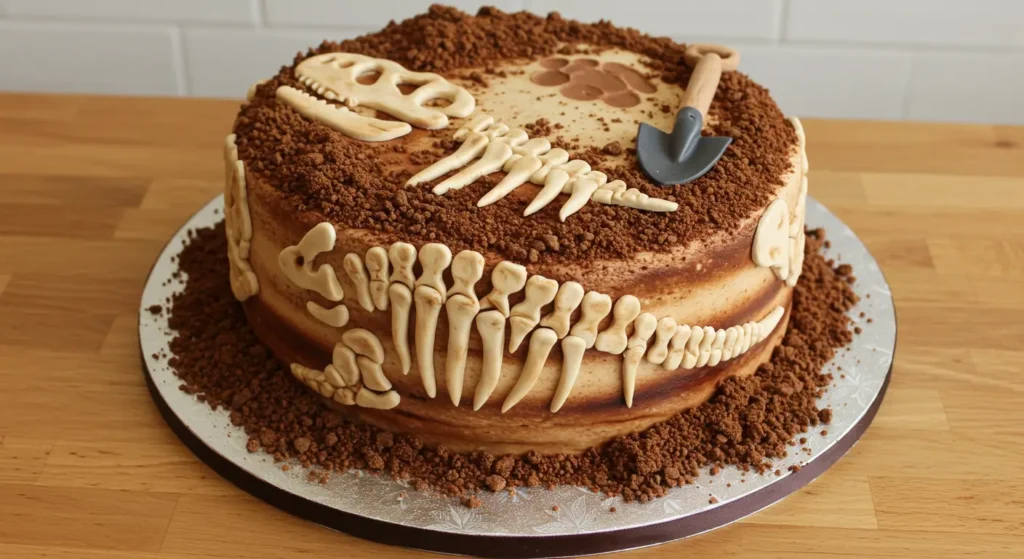
- Dinosaur Tracks and Fossils: If you want something unique, consider creating a dinosaur fossil cake. This involves shaping the cake to look like a fossil embedded in the earth or a cake decorated with footprints and bones made from fondant.
Each design offers a chance to show off your creativity while keeping the dinosaur cake fun and exciting for guests, particularly younger children who are fascinated by dinosaurs.
For a step-by-step guide to baking a delicious and beautiful cake, try this simple and delightful Heart Cake Recipe.
Tools and Equipment You’ll Need for Dinosaur Cake Recipe

To create a stunning dinosaur cake, having the right tools is essential. Some tools are necessary for the baking process, while others are crucial for the decoration phase.
Must-Have Baking Tools
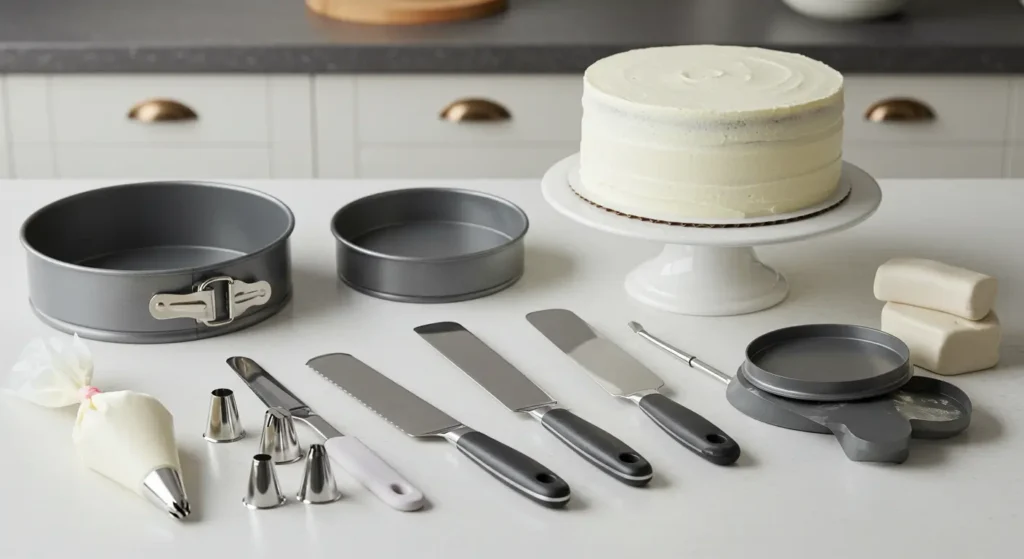
- Cake Pans: Depending on the size and shape of the cake, you will need standard round or rectangular cake pans. For sculpted cakes, a variety of pans in different sizes may be required to build the dinosaur’s body and head.
- Serrated Knife: A serrated knife is essential for carving the cake once it has cooled. It allows for smooth, even cuts when shaping the cake into the desired dinosaur form.
- Offset Spatula: This tool is perfect for applying and smoothing out layers of buttercream or fondant. It ensures an even coating and helps to give your cake a professional finish.
Essential Cake Decorating Supplies
- Fondant: A pliable sugar dough that is perfect for covering cakes and creating detailed decorations. It is particularly useful when sculpting a 3D dinosaur cake.
- Buttercream: This is the classic frosting choice for covering cakes and creating detailed textures. It’s great for giving your dinosaur cake a smooth finish, or you can pipe it into decorative elements like scales and teeth.
- Piping Bags and Tips: These are essential for adding intricate details, such as texturing the dinosaur’s skin or creating the smaller features like claws and eyes.
- Edible Paint: For an added level of detail, edible paints allow you to add realistic textures, shadows, or color to your dinosaur cake. This can help give the dinosaur a more lifelike appearance.
With these tools, you will be well on your way to creating a memorable dinosaur cake that will impress your guests.
Selecting the Perfect Dinosaur Cake Recipe
Choosing the right cake recipe is one of the most important steps when making a dinosaur cake. The texture and stability of the cake are crucial, especially when you’re sculpting and decorating.
- Sturdy Cakes for Sculpting: If you plan to carve your cake into the shape of a dinosaur, choose a dense recipe like a pound cake or butter cake. These cakes hold their shape better and are less likely to crumble or collapse under the weight of fondant or frosting.
- Moist Cakes for Layering: If you’re making a layered dinosaur cake, a lighter cake like a vanilla or chocolate cake can be a good choice. However, ensure it’s not too fluffy, as overly light cakes may struggle to hold up when stacked or decorated.
- Flavor Options: Popular flavors for dinosaur cakes include chocolate, vanilla, and even carrot cake. Choose a flavor that complements the party theme and one that will be enjoyed by the majority of guests.
Make sure to follow the recipe instructions closely, and allow the cake to cool completely before sculpting or decorating.
Step-by-Step Guide to Baking the Dinosaur Cake Base

Prepping Your Ingredients
Before you start baking, ensure that all ingredients are measured and ready to go. It’s best to have them at room temperature, especially butter, eggs, and milk, as this helps to achieve a smooth, even batter.
Mixing and Baking Techniques
Follow the instructions of your recipe carefully, making sure to mix the ingredients gently. Overmixing can lead to a dense, heavy cake, so mix just until combined. Bake the cake at the temperature specified in the recipe, and check for doneness by inserting a toothpick into the center of the cake. It’s ready when the toothpick comes out clean or with a few crumbs.
Allow the cake to rest in the pan for about 10-15 minutes after baking, then gently transfer it to a wire rack. This step ensures the cake stays firm and avoids sogginess. Always let the cake cool completely before decorating to prevent melting or smearing frosting.
Designing the Dinosaur Cake Shape

Shaping a dinosaur cake can seem intimidating, but with a little patience and the right tools, you can achieve a great result. Start by cutting the cake into basic shapes that resemble the dinosaur’s body, head, and tail. Carefully shape the cake using a serrated knife, trimming it to match the desired design.
When carving, keep the following tips in mind:
- Start with the Body: Trim the largest portion first, ensuring it has the proper proportions for the dinosaur’s body.
- Carve in Small Steps: Work in small sections, gradually refining the shape of the legs, neck, and head.
- Use Cake Scraps: If the shape doesn’t seem perfect, use leftover cake pieces to build up certain areas, like the tail or legs.
Once the basic dinosaur shape is carved, apply a crumb coat of frosting to seal the cake and prepare it for the final layer of buttercream or fondant.
Need the perfect tool for your next baking project? Learn more about the best Heart-Shaped Cake Pan to achieve flawless results.
Decorating Tips and Tricks
When it comes to decorating your dinosaur cake, there are several techniques you can use to create a visually striking design:
- Smooth Fondant Application: Roll out the fondant evenly, then drape it over the entire cake. Smooth out the fondant with a specialized tool to eliminate air pockets and achieve a polished finish.
- Textured Details: Use a variety of piping tips to create textures that resemble scales, spikes, or skin. This adds depth and makes the dinosaur look more lifelike.
- Adding Facial Features: For the face, you can sculpt eyes, teeth, and nostrils out of fondant or use edible paint to add detail. Piping bags with small tips are useful for intricate detailing.
- Edible Paint and Colors: Use edible paints to add subtle shading or bring out textures in the dinosaur’s body. You can also use food coloring to add vibrant hues to the cake, enhancing the design.
Remember, take your time with the decorating stage, as this is where your cake’s personality really comes through.
If you’re looking for creative cake ideas to make your celebrations extra special, check out these 10 Heart Cakes for Special Occasions for inspiration.
Common Mistakes and How to Avoid Them
Even experienced bakers make mistakes when making a dinosaur cake. Here are some common pitfalls to avoid:
1. Using the Wrong Cake Recipe
Make sure to choose a dense cake recipe for sculpting, such as a pound cake. Lighter cakes may crumble and not hold their shape.
2. Not Allowing the Cake to Cool
Never carve or decorate a warm cake, as it can cause frosting to melt or lead to inaccurate shapes. Always let the cake cool completely.
3. Overworking Fondant or Buttercream
Avoid overworking the fondant, which can cause cracks, or over-whipping buttercream, which can make it too soft. Knead fondant gently and stop whipping buttercream once it’s smooth.
4. Poor Cake Support
Use dowels or supports for larger cakes to prevent them from collapsing, especially for multi-tiered designs.
5. Rushing the Decoration
Take your time when decorating. Rushing can result in uneven layers or missed details. Work slowly and carefully to ensure each feature is perfect.
Conclusion and Final Thoughts
Creating a dinosaur cake is a fun and rewarding experience. From choosing the right recipe to sculpting and decorating, each step allows you to showcase your creativity and bring a prehistoric masterpiece to life. Whether you’re making a simple dinosaur cake for a child’s birthday or an intricate, detailed design for a themed party, the effort you put in will surely be appreciated.
By avoiding common mistakes, using the right tools, and taking your time with the design process, your dinosaur cake will not only be delicious but also a work of art that will wow your guests. So, roll up your sleeves and dive into this fun cake-making adventure!
Frequently Asked Questions
How to shape a cake like a dinosaur?
To shape a dinosaur cake, bake a firm cake and carve it into a dinosaur shape with a serrated knife. Start with the body and work your way to the details like legs, tail, and head, refining the shape as you go.
How many cupcakes does it take to make a dinosaur cake?
Typically, you need 12 to 16 cupcakes for a basic dinosaur cake, depending on the size and style. Arrange them creatively to form the body and head of the dinosaur.
How to make a dino fossil cake?
Carve a cake to resemble a fossil and use fondant or chocolate to create dinosaur bones. Add crumbs or dirt-like textures to mimic an ancient fossil find.
What is the name of Dora cake?
A Dora cake is a themed cake based on the popular character Dora the Explorer. It typically features Dora’s likeness and adventure-related elements like animals and jungle scenes.

2 thoughts on “Dinosaur Cake Recipe: Step-by-Step Guide for Beginners”