A heart cake is not just a dessert, it’s a symbol of love, affection, and celebration. Traditionally associated with romantic occasions like Valentine’s Day, these cakes have transcended their typical use to become a beloved treat for various celebrations. The heart-shaped design, often adorned with beautiful decorations and vibrant colors, evokes emotions and makes any occasion feel extra special. The versatile nature of heart cakes lets you customize them to suit different tastes. They make an excellent choice for birthdays, anniversaries, weddings, or even as a thoughtful gesture of appreciation.
Table of contents
Ingredients for a Delicious Heart Cake
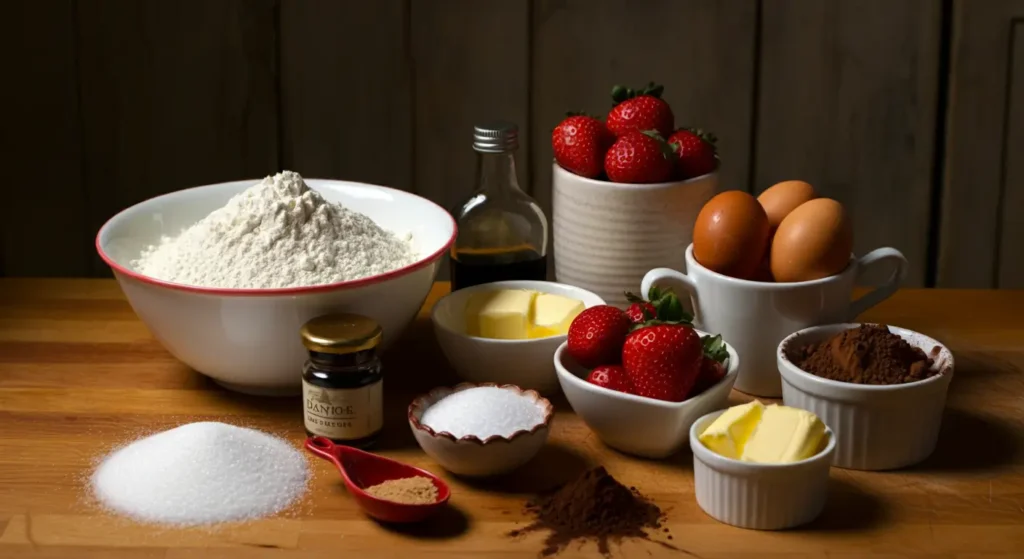
Creating a delectable heart cake starts with choosing the right ingredients. Each element plays a vital role in achieving the perfect balance of flavor, texture, and appearance. The beauty of heart cakes is their adaptability, allowing you to experiment with different ingredients to suit your personal taste or dietary preferences. Below are the essential ingredients you will need to craft a classic and mouthwatering heart cake.
- Flour: All-purpose flour is typically used for a light and airy sponge. You can opt for whole wheat flour for a healthier version, but it will result in a denser texture.
- Sugar: Granulated sugar is essential for sweetness, but you can also experiment with alternatives like honey, maple syrup, or coconut sugar for a unique flavor.
- Butter or Oil: Butter provides a rich, creamy texture, while oil results in a moist, soft cake. Choose based on your preference or dietary restrictions.
- Eggs: Eggs are crucial for binding the ingredients and adding structure to the cake. They also help in creating a fluffy texture.
- Baking Powder: This leavening agent helps the heart cake rise, making it light and airy.
- Milk or Cream: Adds moisture to the batter, making it rich and smooth.
- Vanilla Extract: A must for flavor, vanilla extract gives a warm, aromatic undertone to the cake.
- Cocoa Powder or Fruit Purees: For added flavor and color, you can use cocoa powder for a chocolate version or fruit purees like strawberry or raspberry to create a fruity variation.
- Frosting: Heart cakes are often adorned with frosting, which can be buttercream, whipped cream, or fondant, depending on the look and taste you desire.
When you combine these simple ingredients with a touch of creativity, the result is a heart cake that’s not only visually stunning but also irresistibly delicious.
Preparing Your Heart Cake Batter
Once you’ve gathered all the ingredients and chosen the perfect heart-shaped cake pan, it’s time to focus on preparing the batter. The key to a moist, fluffy, and delicious cake lies in how you mix your ingredients. Here’s a step-by-step guide to help you prepare the batter with ease and confidence:
1.Preheat the Oven
Begin by preheating your oven to the temperature specified in your recipe, typically around 350°F (175°C). This assures that your cake bakes evenly and rises properly.
2.Sift Dry Ingredients
In a large bowl, sift together your dry ingredients—flour, cocoa powder (if using), baking powder, and salt. Sifting helps to prevent clumps and verify even distribution of the leavening agents, giving your heart cake a light, airy texture.
3.Cream the Butter and Sugar
In a separate bowl, beat together your butter (or oil) and sugar until the mixture is light and fluffy. This step is important because it incorporates air into the batter, contributing to the cake’s softness. Use an electric mixer for quicker results, or beat by hand if you prefer a more hands-on approach.
4.Add the Eggs
one at a time, ensuring each one is well blended into the mixture before adding the next. Eggs play a vital role in binding the ingredients and giving the cake its structure.
5.Incorporate Wet Ingredients
Gradually add in your milk or cream, along with any extracts like vanilla or almond. Stir well to assure the batter remains smooth. If you’re using fruit purees, fold them in gently to maintain the texture.
6.Combine Wet and Dry Ingredients
Slowly add the sifted dry ingredients into the wet mixture, alternating with milk or cream. Start and end with the dry ingredients. Mix gently with a spatula or a low-speed setting on your mixer to avoid overworking the batter, which can lead to a dense cake.
7.Add Optional Ingredients
If you’re making a flavored heart cake, now is the time to add any extras like chocolate chips, nuts, or fruit pieces. Gently fold them into the batter so that they’re evenly distributed without deflating the mixture.
7.Check the Consistency
The batter should be smooth and slightly thick but not overly stiff. If the batter is too thick, add a little more milk; if it’s too runny, add a small amount of flour. The goal is to achieve a consistency that will pour easily into your heart-shaped cake pan without spreading too thinly.
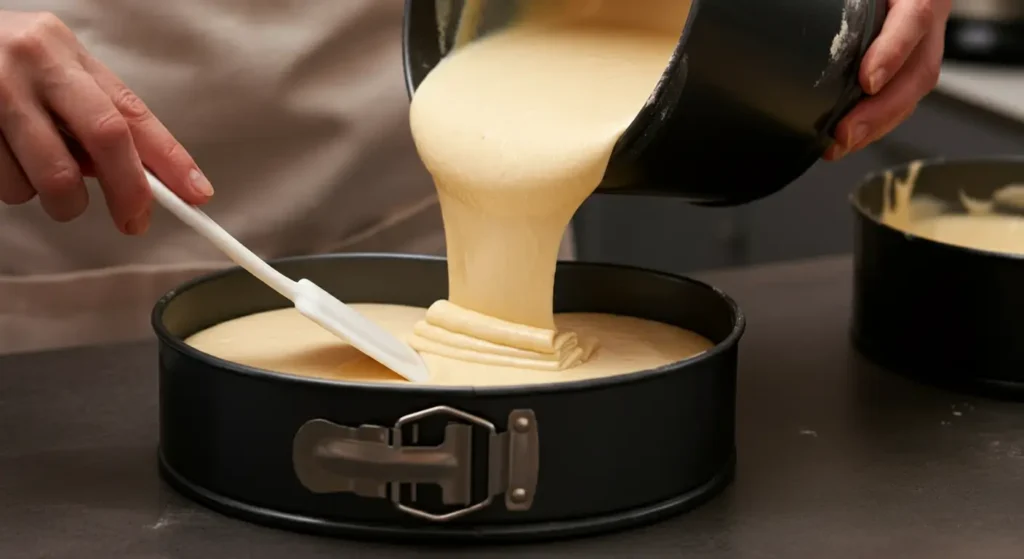
Once your batter is prepared, it’s ready to be poured into your heart-shaped cake pan. Smooth the top with a spatula for an even surface, and make sure the batter is evenly distributed. With these steps, you’re on your way to creating a perfectly baked cake.
Baking Your Heart Cake to Perfection
Baking your heart cake to perfection requires careful attention to both time and temperature. Even slight variations can impact the texture, flavor, and overall success of your cake. Here’s how to assure that your heart cake bakes beautifully every time.
Technical Preparation for your Heart Cake
- Preheat the Oven: As mentioned earlier, always preheat your oven to the temperature specified in your recipe. This guarantees that the heart cake begins baking immediately and rises evenly. Most recipes call for a temperature of 350°F (175°C) but always double-check the specifics.
- Prepare the Cake Pan: Before pouring the batter into your heart-shaped cake pan, it’s crucial to grease and flour the pan to prevent sticking. You can also line the bottom with parchment paper for added security. If your pan is non-stick, this step may not be necessary, but it’s always better to be cautious.
For more information you can check our full article on Choosing the Perfect Heart Shaped Cake Pan – Mastered Recipes - Pour the Batter Evenly: Carefully pour your prepared batter into the heart-shaped cake pan, ensuring it’s evenly distributed. Use a spatula to level the surface and release any trapped air pockets. This will help the cake bake evenly, giving you a smooth, flat surface.
Baking preparation for your Heart Cake
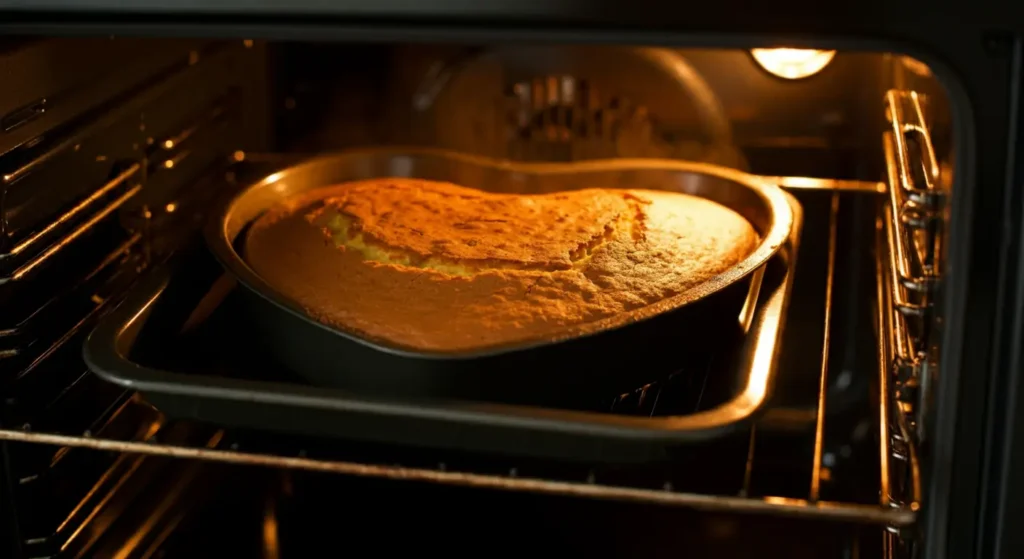
- Bake the Cake: Place the pan on the middle rack of your preheated oven. Bake the heart cake for the time specified in your recipe, typically between 25-35 minutes, depending on the size and depth of the pan. Refrain from opening the oven door during the first 20 minutes of baking, as this can cause the cake to collapse.
- Check for Doneness: To check if your heart cake is fully baked, insert a toothpick or cake tester into the center of the cake. The cake is ready when a toothpick inserted into the center comes out clean or with a few moist crumbs attached. If it’s still wet or sticky, continue baking for an additional 5-10 minutes, checking frequently.
- Monitor for Even Baking: If you notice that one side of the cake is browning faster than the other, rotate the pan halfway through the baking time. This helps establish that your heart cake bakes evenly, especially if your oven has hot spots.
- Cool the Cake: Once the cake is baked, remove it from the oven and let it cool in the pan for about 10-15 minutes. This allows the structure to firm up. Then, gently turn the pan upside down onto a wire rack to fully cool. If you use parchment paper, carefully peel it away from the edges as the cake cools.
- Avoid Overbaking: Overbaking your heart cake can lead to a dry, crumbly texture. Keep a close eye on the cake during the final stages of baking and remove it as soon as a toothpick comes out clean.
By following these simple yet important steps, your heart cake will bake to perfection every time. The result will be a beautifully risen, moist cake, ready for decoration or simply enjoyed on its own.
Tips for Transporting and Storing Heart Cakes
Whether you’re bringing a heart cake to a special occasion or simply storing leftovers for later enjoyment, proper handling is essential to make certain that the cake stays intact and fresh. Here are some practical tips for transporting and storing your heart cake:
1. Transporting Your Heart Cake
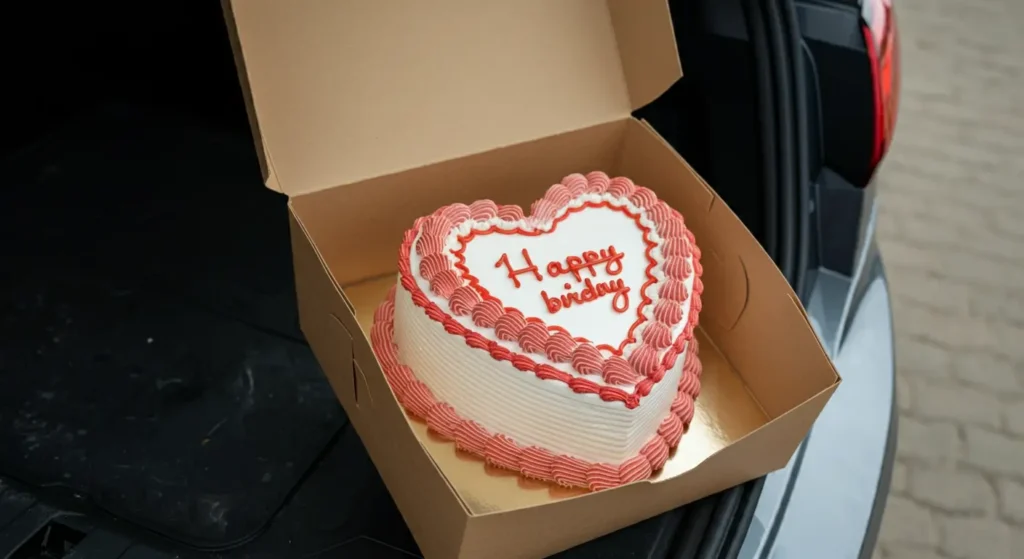
Transporting a heart cake can be tricky, especially if it’s a multi-layered or delicately decorated cake. Follow these steps to ensure the cake reaches its destination safely:
- Use a Sturdy Cake Box: Choose a cake box with secure edges and a stable base to prevent shifting during transport. Ensure the box is large enough to fit the cake without damaging the decorations.
- Secure the Cake with Cake Boards: Position your cake on a firm cake board to evenly distribute its weight and prevent tilting or breaking. For particularly large or heavy cakes, use a double-thick cake board for added stability.
- Use Non-Slip Mats: Place a non-slip mat in the trunk or back seat of your car to keep the cake from sliding. Alternatively, set a damp towel under the cake box for extra grip.
- Consider the Weather: On warm days, refrigerate the cake before transport to preserve the frosting and decorations. Avoid refrigerating fondant-covered cakes, as condensation may cause the fondant to melt. Instead, transport these cakes in a cool, dry area.
- Handle with Care: Drive carefully to avoid sudden stops or sharp turns that might shift or topple the cake. Whenever possible, keep the cake in the front seat to monitor it during transport.
2. Storing Your Heart Cake
Proper storage keeps your heart cake fresh for as long as possible. Follow these tips for storing cakes both before and after cutting:
- Room Temperature Storage: Plan to consume your heart cake within 1-2 days? Store it at room temperature. Place the cake in an airtight container or wrap it with plastic to prevent drying out. Keep it in a cool, dry spot, away from heat and direct sunlight.
- Refrigerating Heart Cakes: Cakes with perishable fillings or frosting, like whipped cream or fresh fruit, must be refrigerated. Cover the cake with a dome or plastic wrap to stop it from absorbing other odors in the fridge.
- Freezing Heart Cakes:Need to store your cake for an extended time? Freezing works well.
- Unfrosted Cakes: Wrap individual layers tightly in plastic wrap and place them in a freezer-safe bag or container. Freeze layers for up to 3 months. Thaw them at room temperature before frosting.
- Frosted Cakes: Freeze frosted cakes uncovered for 1-2 hours until the frosting hardens. Then, wrap the entire cake in plastic wrap and foil. This preserves the shape and design without smudging the decoration. Thaw the cake in the fridge overnight or at room temperature for a few hours before serving.
- Avoid Freezing Fondant Decorations: Fondants may crack and lose their smooth texture when frozen. Instead, store fondant-covered cakes in a cool, dry area at room temperature.
FAQ’s
How to make a heart-shaped cake?
To make a heart-shaped cake, use a heart-shaped pan or bake two round cakes, cut one in half, and arrange the pieces to form a heart shape. Decorate with icing, sprinkles, or fruit.
How many will an 8-inch heart cake feed?
An 8-inch heart-shaped cake typically serves 12-16 people, depending on slice size.
How to make a heart cake without a heart-shaped pan?
To make a heart-shaped cake without a heart pan, bake two round cakes, cut one in half, and arrange the halves to form a heart. Trim as needed and decorate.
How many slices are in a 10-inch heart cake?
A 10-inch heart cake typically yields 16-20 slices, depending on the slice size.
What size cake is needed for 20 people?
For 20 people, a 10-inch round or heart-shaped cake is ideal. It will yield about 20 slices, depending on the portion size.
3 thoughts on “Heart Cake Recipe: Step-by-Step Instructions”