There’s something magical about popping open a jar of crisp, garlicky dilly beans in the middle of winter. The sharp tang, the crunch that makes your mouth happy, the garlic kick—everything about these beans whispers comfort. In this article, I’ll share not just the exact steps to making Grandma’s crispy garlic dilly beans recipe, but the family story behind it. You’ll learn how to prep the beans, master the brine, safely can them for long-term storage, and how to enjoy them creatively.
Table of Contents
From Grandma’s Garden to My Pantry – A Story Behind the Crunch
Every summer, Grandma’s backyard burst with rows of slender green beans. She’d hand me a tin pail and say, “Pick the ones that snap when you bend ’em.” We’d return to her cozy kitchen, sun slanting through the lace curtains, where the smell of dill and vinegar filled the air. It was more than cooking—it was preserving memories. I remember hearing the lids pop into place as the jars cooled, signaling another batch of crispy garlic dilly beans sealed for the season.
That exact scent still fills my kitchen today, especially when I follow her method, much like the tangy balance found in Crispy Garlic Dill Pickles for Canning. Every batch reminds me of her patience and precision. These beans weren’t just a snack—they were tradition in a jar.
And when paired with hearty dishes like Slumgullion, they transform a basic meal into something truly special. That’s the kind of kitchen legacy we all crave.
Why These Dilly Beans Still Matter Today
There’s a reason this recipe remains a staple through generations. It’s practical, flavorful, and the crunch never disappoints. Vinegar preserves the beans’ structure. Garlic infuses boldness without overwhelming. Dill brings brightness. And when properly packed and processed, these jars last for months on your shelf. Whether you use them on charcuterie boards or pull them out for a quick snack, Grandma’s crispy garlic dilly beans are a gift to your future self.
Print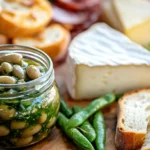
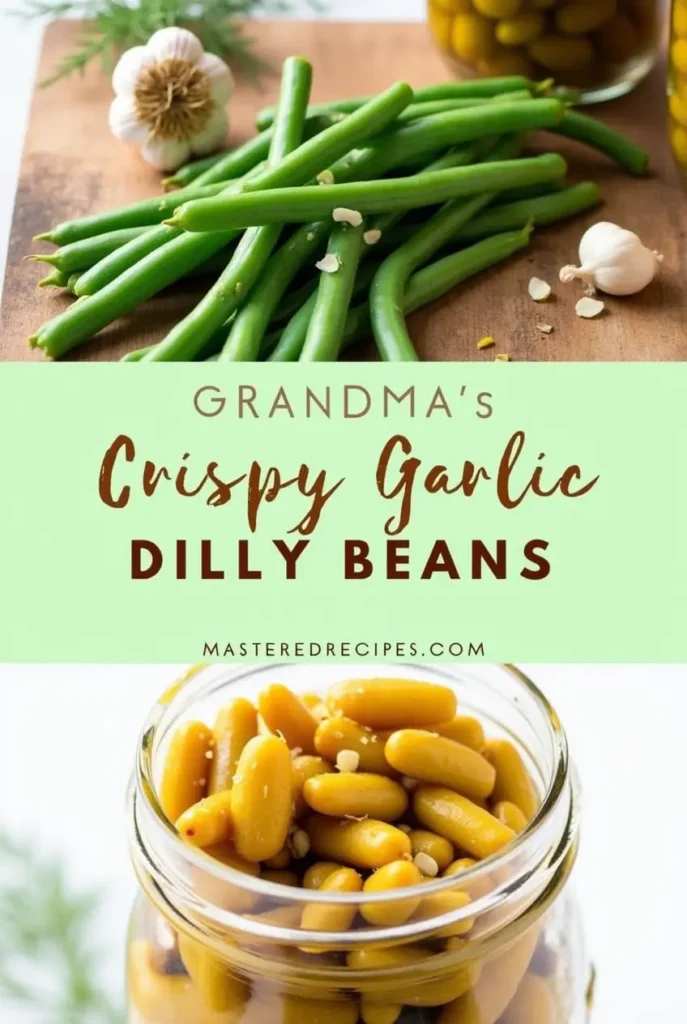
Grandma’s Crispy Garlic Dilly Beans Recipe
- Total Time: 40 minutes
- Yield: 6 pint jars
Description
A traditional family recipe for crispy garlic dilly beans, perfect for canning and enjoying year-round.
Ingredients
- 2 lbs green beans, trimmed
- 2 1/2 cups white vinegar (5% acidity)
- 2 1/2 cups water
- 1/4 cup pickling salt
- 6 sprigs fresh dill or 1/2 tsp dill seeds per jar
- 1–2 garlic cloves per jar
- Optional: red pepper flakes or mustard seeds
Instructions
- Wash and trim green beans to fit pint jars.
- Sterilize jars in boiling water for at least 10 minutes.
- In a saucepan, bring vinegar, water, and salt to a boil.
- Pack green beans tightly into jars with garlic and dill.
- Pour hot brine over beans, leaving 1/2-inch headspace.
- Wipe rims clean, seal with lids and bands.
- Process in boiling water bath for 10 minutes.
- Let jars cool completely. Listen for the lid pop!
Notes
Store sealed jars in a cool, dark place for up to 1 year. Refrigerate after opening and use within 2–3 weeks. Add red pepper flakes for extra heat.
- Prep Time: 30 minutes
- Cook Time: 10 minutes
- Category: Preserves
- Method: Canning
- Cuisine: American
Nutrition
- Serving Size: 4–5 beans (1/8 jar)
- Calories: 25
- Sugar: 1g
- Sodium: 310mg
- Fat: 0g
- Saturated Fat: 0g
- Unsaturated Fat: 0g
- Trans Fat: 0g
- Carbohydrates: 5g
- Fiber: 2g
- Protein: 1g
- Cholesterol: 0mg
Keywords: dilly beans, garlic pickles, green beans, canning
What You Need to Make Them Just Right
Ingredients That Keep It Simple and Sharp
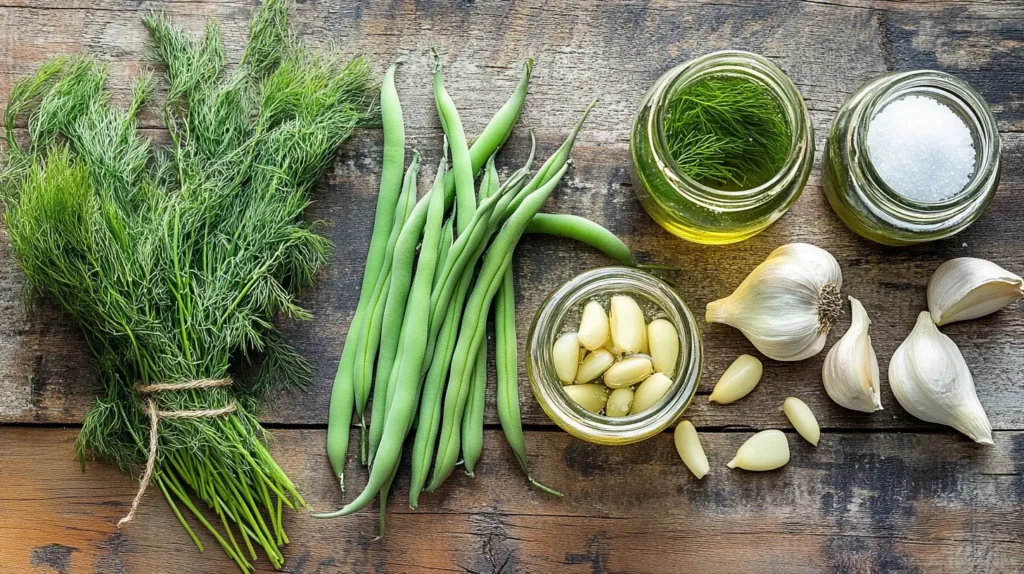
You don’t need a long grocery list. The key lies in the quality of your basics:
- Fresh green beans – preferably young and tender
- Garlic cloves – peeled and trimmed, one per jar or more for intensity
- Fresh dill heads or dill seeds
- White vinegar (5% acidity) – the backbone of any proper pickle
- Water – filtered, especially if your tap water has high chlorine
- Pickling salt or kosher salt – avoid table salt
- Optional: red pepper flakes, mustard seeds, or black peppercorns
When organizing ingredients, I often pull from my pantry just like when I make Sweet and Sour Apple. Simplicity wins when everything serves a purpose.
Tools You’ll Actually Use Again
Here’s what helps get the job done without clutter:
- Large pot or water bath canner
- Mason jars (pint-size, wide-mouth recommended)
- Lids and bands
- Jar lifter and funnel
- Measuring cups and a clean towel
This isn’t high-tech cooking—just thoughtful, hands-on prep. It’s similar to how I layer ingredients for Zucchini Lasagna Roll-Ups, precise and rewarding.
How to Make Grandma’s Crispy Garlic Dilly Beans Recipe
Preparation Steps That Preserve Crunch
Start by washing your green beans thoroughly. Trim the ends, ensuring each bean fits vertically inside your jars. While some recipes recommend blanching, I skip it—just like Grandma did—to retain the ultimate snap. Instead, keep the beans raw and cold.
Meanwhile, sterilize your jars. Heat a large pot of water until boiling, then let the jars gently simmer in it for a full 10 minutes to sterilize.. Set them upside down on a clean towel while preparing the brine.
Don’t forget to prepare your workspace. Having everything laid out matters. Just like when preparing Cinnamon Queen Chicken, order is key.
Brine, Pack, and Seal the Right Way
Here’s the exact brine:
- 2 1/2 cups water
- 2 1/2 cups white vinegar
- 1/4 cup pickling salt
Bring the mix to a boil. Then immediately reduce heat and keep it hot.
Pack your jars tightly with trimmed green beans. Tuck in a sprig of fresh dill and 1–2 garlic cloves. If you love heat, add a pinch of red pepper flakes.
Using a funnel, pour hot brine into each jar, leaving 1/2-inch headspace. Tap the jars to release air bubbles. Wipe the rims, add lids and bands (fingertip tight).
Submerge the sealed jars in boiling water and let them process for a 10-minute cycle to ensure shelf stability. Let cool undisturbed. Listen for that satisfying “pop.”
You’ll feel the same joy you do when you jar up homemade pantry staples like Homemade Cottage Cheese Chips.
FAQs and Serving Ideas
Everything You’ve Wanted to Ask About Dilly Beans
Can I use other types of beans?
You can use wax beans if you prefer, but keep in mind they usually have a softer bite than green beans.
How long do they last?
Unopened jars last 12 months in a cool, dark pantry. After opening, use within 2–3 weeks.
Is fresh dill better than dried?
Absolutely. Fresh dill offers more aroma and brightness.
Can I skip garlic?
Technically yes—but why would you? It’s the soul of this recipe.
How do I make them spicier?
Add a whole chili or more red pepper flakes per jar.
Can I use apple cider vinegar?
Yes, but stick to 5% acidity and know the flavor will mellow slightly.
Do I have to use a canner?
Yes, for shelf-stable jars. Otherwise, keep them refrigerated and eat within 3 weeks.
How to Serve and Pair Garlic Dilly Beans
- Serve alongside cured meats, cheeses, and a piece of Braided Chocolate Chip Brioche as part of a flavorful snack platter.
- Slice and toss into potato salad or deviled eggs
- Include in sandwich wraps or grilled cheese sides
- Pair with Air Fryer Turkey and Cheese Sliders for lunchbox brilliance
- Or just eat them straight from the jar—you earned it
These beans work across the board: classy party appetizer or crunchy midweek treat.